How to Use Dry Ice and Dry Ice Coolers
Updated by Brandon F. on August 30, 2022
For those looking for an extra bit of cooling performance for your next camping or fishing trip, you might consider using dry ice in replacement of conventional ice if you have a dry ice cooler. Dry ice, ice cubes, and ice packs all have unique pros and cons and certain scenarios might be better suited for using one or the other.

This article will be focusing on dry ice and its many unique benefits and also provide instructions on how to use it. Finally, we will list a variety of coolers that are designed to handle dry ice.
What is Dry Ice?
Unlike standard ice cubes which are made of good old-fashioned frozen water, dry ice is made of gas! Specifically, it is comprised of cardice, which is a solid form of carbon dioxide. In this solid form, dry ice is significantly colder than ice, with a sublime temperature of -109.3 °F (-78.5 °C). What this means is that it is capable of getting items much colder than ice can and in highly-insulated environments potentially for long periods.
At temperatures below -69.5 °F (-56.4 °C) and pressures below 5.13, the frozen CO2 changes from a solid back to a gas with no liquid form in between through a process called sublimation. When the dry ice is being produced (discussed below) the process is called deposition.
How is Dry Ice Manufactured?

The method of producing dry ice is surprisingly simple. Okay, perhaps it isn’t quite as simple as the method of producing ice but it isn’t far behind! First, a high concentration of carbon dioxide gas is produced via a variety of methods including refineries and various fermentation processes. This carbon dioxide gas is then pressurized and refrigerated until it converts to a liquid form.
Once this stage is complete, the pressure is reduced. When the pressure is reduced, portions of the liquid carbon dioxide vaporize and this results in a sudden rapid drop in the temperature of the carbon dioxide liquid that remains. The result is the liquid solidifying into a snow-like form which is then compressed into blocks.
Benefits of Dry Ice
Dry ice has many benefits, but for the sake of this article, we will focus on those that apply to coolers. First, as mentioned above, dry ice is extremely cold. What this means is that you can get items cold much quicker than traditional ice or ice packs.
This is good if you are in a rush to chill some drinks that have been outside all day or if you are packing something that absolutely can’t go above a certain temperature for even a short period. It is also handy if you are in a hurry to cool your items down. This could apply if you recently processed some meat or just picked some fresh product that you need to get chilled as quickly as possible.
Second, dry ice also doesn’t leave the watery mess that ice does. When dry ice melts, it simply is the carbon dioxide returning to its gas form. This is what you see in the videos of dry ice where it appears that white smoke is billowing out from the container.
This is beneficial for two reasons: You don’t have to worry about water soaking and potentially ruining any items that you have stored in the cooler. Have you ever packed lunch in a cooler with ice only to open it and see your sandwiches soggy from floating in the water? That isn’t an issue with dry ice. Also, the cooler can often be much lighter since you don’t have to lug around water that has melted.
Third, dry ice packs a bigger punch for its size. This can be helpful in cases where you don’t have a lot of additional space for ice but still need things to stay cold or if you are trying to keep your cooler as light as possible while still keeping items cold. For instance, if you are mountain climbing or skiing you want to be as mobile as possible so using dry ice to keep your essential items chilled might be a viable approach.
Challenges with Dry Ice
Dry ice doesn’t come without its issues as well. There are some cases where you might be better off using standard ice cubes or ice packs over dry ice.
First, dry ice is cold. This might seem like a good thing but in some cases, it is simply TOO cold. When you have objects close to or touching the dry ice, they will become completely frozen. This can damage if not ruin certain types of food so extra care needs to be taken when using it.
As a general rule of thumb, we recommend keeping most of your dry ice usage to items that need to remain frozen instead of simply chilled. Sandwiches, drinks, cheeses, etc. are better off being put in a standard cooler with standard ice. Ice cream, frozen meats, etc. are much better suited for dry ice.
Second, dry ice “melts” significantly quicker than normal ice. Dry ice will sublimate around 5 to 10 pounds per 24 hours in a standard ice chest. A better-sealing, higher-performance ice chest will see longer dry ice life but it is still nowhere near what normal ice experiences. Because of this, dry ice might not be well suited for long excursions where you plan on needing to keep items cold for several days at a time without adding additional ice.
Finally, dry ice is significantly more expensive than regular ice per given size or weight. If you need to cool a lot of items and require a significant amount of ice or dry ice, you are probably better off going with simple ice or you will find yourself opening up your wallet a bit more than you would prefer. This is even more the case if you are needing to keep those large amount of items cool for a long period.
How to Use Dry Ice
If you decide to give dry ice a try, there are some important steps you need to take to make sure that not only get the most out of your dry ice but also do so safely.

It is recommended that you use proper gloves when handling dry ice, such as these Ninja Ice gloves. (Amazon Link)
First, any time you are handling dry ice it is important to be using the proper handling equipment. This includes wearing protective gear such as thick cloth or gloves. While temporary contact with dry ice isn’t detrimental, extended touching can result in ice burns which are extremely painful and can leave pretty nasty scars!
We recommend waiting until the absolute last minute to purchase dry ice. Since it evaporates fairly quickly, the longer you wait between purchasing it and using it the less performance you will receive for a given block.
When transporting or storing, be sure to pack in a properly insulated container that isn’t in direct contact with anything that can’t handle becoming very cold or potentially frozen. Do NOT simply put dry ice in a shopping bag and drive it home like you would your groceries.
It needs to be properly contained. In addition, ensure that there is proper ventilation during storage or transport. Carbon dioxide in quantities above 0.5% can be dangerous for people to breathe, so consider driving with your windows down or cracking a window open if you need to store it in a small room, even if for a relatively short period.
Putting Dry Ice in the Cooler
When it is time to put in your cooler, there are two popular methods of doing so. The first is to put the dry ice on the base of the cooler and place some sort of barrier in between it such as a piece of cardboard with holes cut out or a few towels. Then you would stack your items on top of it. The other method is to put your items in first and then put the dry ice on top of them.
Keep in mind that anything that is touching the dry ice or that is even close to it will likely become completely frozen fairly quickly. In fact, in a smaller cooler, all of the contents may likely become completely frozen! A common approach is to bring two coolers. One cooler for items that need to be accessed soon, in which normal ice is used in. The other cooler would have dry ice put in it which would essentially “flash freeze” the contents for a full day, making them ready for use tomorrow.
It is extremely important to make sure that the cooler is not completely air-tight. This sort of phenomenon is common with many of the higher-end coolers that come with a rubber gasket. You might be asking yourself why. Wouldn’t the open space allow cold air to escape? And you would be correct. However, when dry ice evaporates it turns into a gas that expands and takes up more space than the solid. Without a proper method for this trapped gas to escape, your cooler could turn into a carbon dioxide bomb!
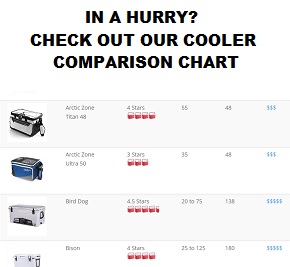
How Much Dry Ice Do I Need?
There is no definite answer to this. There are many variables in play such as the size and insulation ability of the cooler, how much stuff is in the cooler, the outside temperature, and much more. However, a good rule of thumb is that a typical 40 to 60-quart cooler can make do with 10 pounds of dry ice per day.
It might take a few trial runs to get a good idea of how much you need for your particular scenario. As always, we recommend overshooting a bit starting because it is always better to have too much than not enough. To help give you an idea of how much dry ice you will need based on frozen food and drinks you have, check out the table below:
Recommended Amount of Dry Ice
| How Many Hours of Cool Life is Needed | ||||||
|---|---|---|---|---|---|---|
| Amount of Frozen Food and Drinks | Where You Should Put Dry Ice | 4 Hours | 8 Hours | 12 Hours | 24 Hours | 36 Hours |
| 1 Pound | Top Center Bottom | 12 oz None None | 1 lb None None | 2 lbs None None | 3 lbs None 1 lb | 5 lbs None 2 lbs |
| 6 Pounds | Top Center Bottom | 2 lbs None 1 lb | 3 lbs None 1 lb | 3 lbs None 1 lbs | 5 lbs 1 lb 2 lbs | 7 lbs 1 lb 3 lbs |
| 12 Pounds | Top Center Bottom | 3 lbs None 1 lb | 4 lbs None 2 lbs | 5 lbs 1 lb 2 lbs | 9 lbs 1 lb 4 lbs | 12 lbs 1 lb 6 lbs |
| 18 Pounds | Top Center Bottom | 3 lbs None 2 lbs | 4 lbs 1 lb 2 lbs | 6 lbs 2 lbs 3 lbs | 12 lbs 2 lbs 3 lbs | 16 lbs 4 lbs 9 lbs |
| 24 Pounds | Top Center Bottom | 4 lbs 1 lb 2 lbs | 5 lbs 2 lbs 3 lbs | 7 lbs 2 lbs 4 lbs | 15 lbs 3 lbs 8 lbs | 20 lbs 5 lbs 10 lbs |
What are the Best Dry Ice Coolers?
There are a lot of dry ice coolers on the market, and in many cases, the manufacturer promotes that it is capable of being used with dry ice. A few key requirements for a cooler to be dry ice compatible include:
-Constructed with proper material that can handle the extreme cold of dry ice without cracking or warping
-Walls are thick enough to adequately encapsulate the cold internally and not expose people carrying it to freeze burns
-A proper avenue for the evaporated dry ice to escape that preferably doesn’t include having to open the lid. The most common method would be via a drain plug.
As expected, these requirements are mostly covered by the premium cooler brands but there are a few more affordable coolers that we are comfortable recommending as well.
Our Top Dry Ice Coolers
| Price by Volume (Amazon) | Our Rating | Our Full Review | |
|---|---|---|---|
Grizzly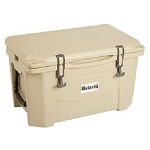 | $$$$$ | Link | |
Yeti Tundra Series | $$$$$ | Link | |
Engel High Performance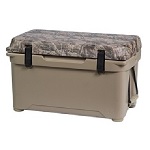 | $$$$$ | Link | |
Pelican Elite | $$$$$ | Link | |
K2 Summit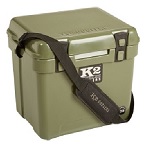 | $$$$$ | Link | |
Igloo Yukon Cold Locker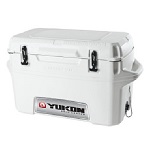 | $$$$$ | Link | |
Rubbermaid Gott Marine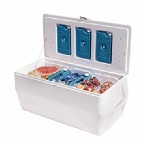 | $$ | Link | |
Coleman Chest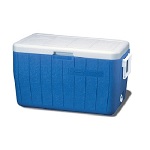 | $ | Link |